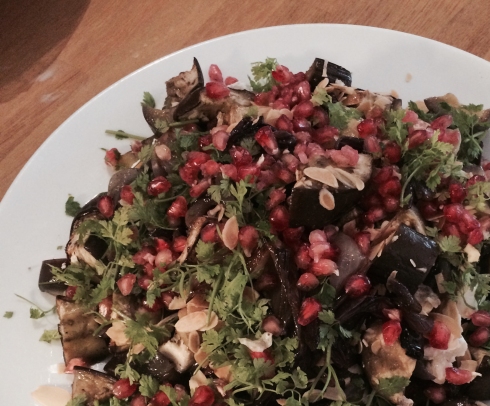
Cumin Roasted Eggplants, Feta, Almonds and Pomegranate Salad

18 Nov

I know, this is not really a seasonal dish that I am writing about today but sometimes you need sun in your plate as well as color.

As Autumn definitely turned our great blue sky into a low grey mess, I thought about that salad that many of you kept asking me about during the past few months.

What really brings the flavor together is the use of pomegranate molasse that is pretty hard to find in France.

So if you look for it, go to a Lebanese shop or order it online. I found mine at Izrael, that great shop located rue François Miron where you find any spice, nut, condiment…. you are looking fot but also where you have to be patient if it is a bit busy. The owners are an old passionate couple and when they serve a customer, they do it properly which means….. they take the time! So don’t be in a hurry and take the time to spend some time in that Aladdin’s cave.


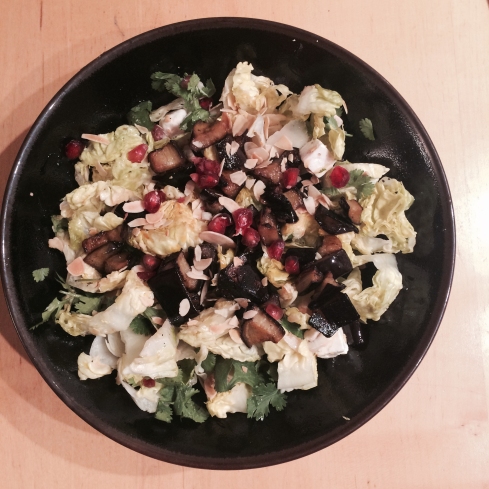
Result large plate

Ingredients

  • 4-5 aubergines (cut in diagonal chunks)
  • 3 red onions, cut into wedges
  • 3 tbsp cumin seeds
  • 100g toasted almond flakes
  • 1/2 bunch of coriander, washed, dried and picked
  • 1 pomegranate, seeded
  • 250g of fresh Feta cheese, crumbled

Ingredients for the Dressing

  • 4 tbsp of pomegranate molasse
  • 6 tbsp of olive oil
  • salt and pepper
  • 1/2 garlic clove crushed

Method

Preheat your oven to 220°C.

Place the aubergines chunks on baking trays lined with parchment paper. Sprinkle them with olive oil, salt, pepper and the cumin seeds.

Roast them in the oven until they get soft to the touch and lightly browned on the edges.

Sprinkle the red onions with olive oil, salt and pepper and roast them the same way you did with the aubergines.

Spread the flaked almonds on a baking tray or in a heavy bottom pan and toast them in the oven or on the stove until lightly browned. Put a timer, they burn very quickly.

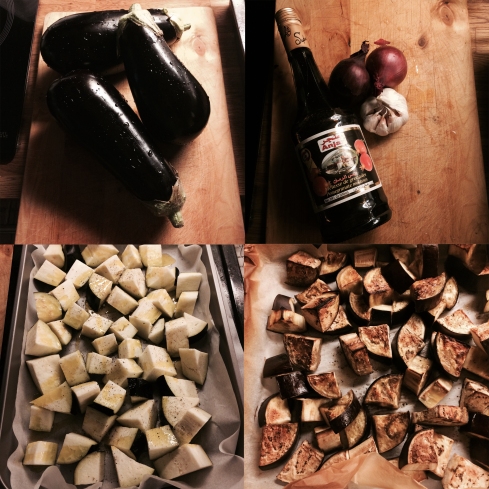
Ingredients Aubergines Salade_edited-1

Pick whole coriander leaves

Cut the pomegranate* into 2 and bash it with a wooden spoon to release the seeds- making sure there is not a lot of white ‘membrane’ coming with it.

In a big bowl or on a large serving dish, layer the aubergine chunks and red onion wedges then add coriander, Feta cheese crumbs, pomegranate seeds and almond flakes.

In a bowl, whisk together all the ingredients of the dressing then drizzle it on top of the salad.

*follow the link to see how to proceed

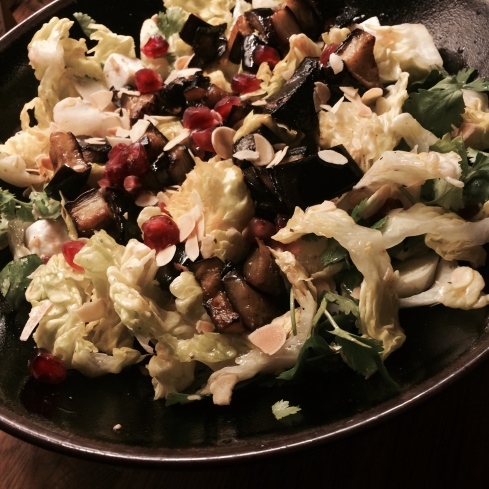
Result Focus  Result Small Bowl

Salade d’Aubergines grillées au Cumin, Feta, Amandes et Grenade

Ingrédients

  • 4-5 aubergines (coupées en morceaux de 3-4cm)
  • 3 oignions rouges coupés en quartiers
  • 3 cas de graines de cumin
  • 100g d’amandes effilées
  • 1/2 bouquet de coriandre lavé, séché
  • 1 grenade
  • 250g de Feta émietté

Ingrédients pour la sauce

  • 4 cas de molasse de grenade
  • 6 cas d’huile d’olive
  • sel et poivre
  • 1/2 gousse d’ail écrasée

Méthode

Préchauffez votre four à 220°C.

Placez vos aubergines sur une plaque recouverte de papier sulfurisé. Enduisez-les d’huile d’olive et assaisonnez de sel, poivre et cumin.

Faites-les cuire jusqu’à ce qu’elles soient tendres à cœur et prennent une jolie couleur brune aux angles.

Faites de même avec les oignons rouges.

Dans une poêle à fond épais ou sur une plaque, dispersez les amandes effilées et torréfiées les 2-3 minutes jusqu’à ce qu’elles prennent une jolie coloration dorée. Attention, comme elles sont fines, elles peuvent très vite bruler.

Prélevez les feuilles de coriandre.

Emiettez la feta en cubes grossiers d’1cm.

Coupez la grenade* en 2 et à l’aide d’une cuillère en bois, égrenez-la en prenant soin d’enlever les morceaux de membranes blanches.

Dans un bol, fouettez les ingrédients de la sauce et gardez à portée de main.

Dans un grand saladier ou sur un grand plat de présentation, disposez les aubergines et les oignons rouges, dispersez les cubes de feta puis les graines de grenade.

Assaisonnez de sauce et finissez avec les amandes et les feuilles de coriandre.

*cf lien de la grenade pour la méthode

Spice up your nuts….

3 Nov

4-Roasted Nuts

Here is a very simple recipe I intended to post for a long time now.

We used to prep those nuts for the partners when I use to work in London and I keep prepping them as everybody crave for them.

It will take you very little time, ingredients and lots of pleasure.


1-Ingredinets


Ingredients for a good reserve of nuts:

  • a handful of Macadamias
  • a handful of Pecans
  • a handful of Cashews
  • 1.5 tbsp of canola oil
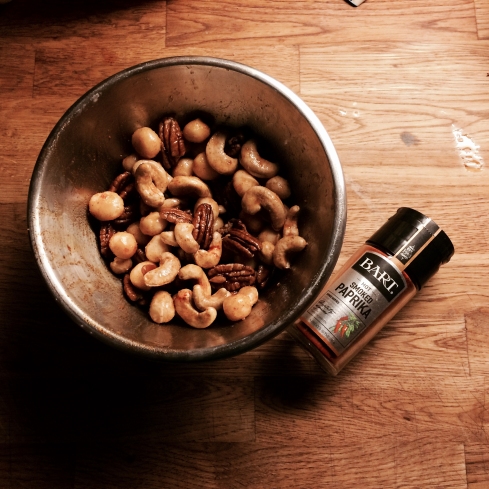
  • 1/2 to 1 tsp Smoked Paprika (sweet or hot depending on your taste)
  • 1/2 tsp of sea salt

Method:

Preheat your oven to 180°C.

In a bowl, mix together the oil, salt and paprika then rub the nuts with the mix.

2-Tray

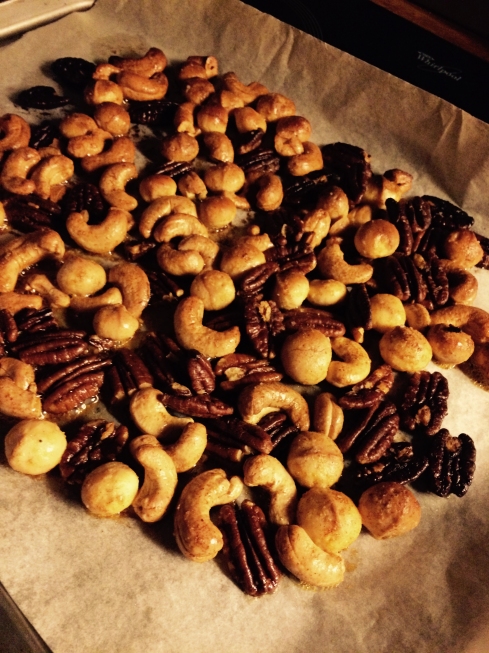
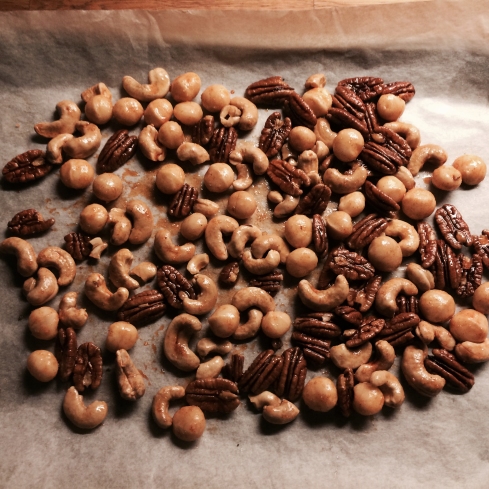
Spread them on a tray covered with parchment paper then roast them in the oven for about 5 minutes until they get a nice golden brown coloration and release a nice smell of roasted nuts.

Stir them halfway through while they are in the oven so that they roast properly then let them cool down for a few minutes.

If they are very oily, pour them on a tray covered with kitchen paper in order to absorb the excess of oil then serve them straight away with drinks or use them to bring flavor to your salads, rice or Bulgour salads for example.

You can use other nuts such as almonds, Brazilian nuts, walnuts….. try to keep in mind that they have to be the same size otherwise they wont roast the same way, some may start to burn while the other one will be undercooked.

You can also do that with seeds (sunflower, pumpkin….) or use other spices but I really like the special flavor of the smoked paprika.

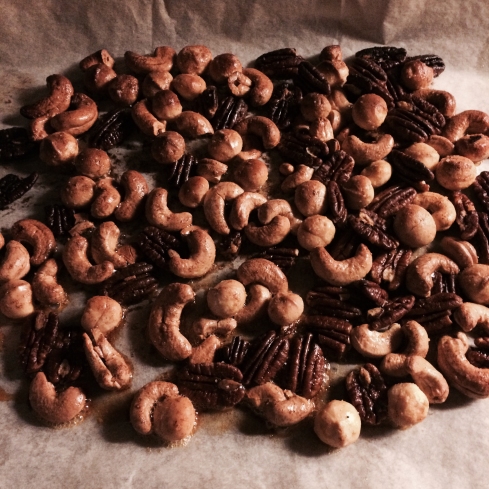
3-Roasted Nuts

Noix Rôties au Paprika Fumé


Ingrédients :

  • 1 poignée de Macadamias
  • 1 poignée de Pecans
  • 1 poignée de Cajous
  • 1 a 1,5 cas d’huile d’arachide
  • ½ to 1 cac de paprika fumé (doux ou fort selon votre goût)
  • ½ cac de sel de mer

Méthode :
Préchauffez votre four à 180°C.

Mixez l’huile, le paprika et le sel dans un grand bol, enduisez bien les noix avec ce mix puis dispersez-les en une seule couche sur une plaque couverte de papier sulfurisé.

Faites-les rôtir au four environ 5 minutes. Secouez la plaque en cours de cuisson pour faire rôtir les noix sur l’autre face.
Les noix sont prêtes lorsqu’elles prennent une jolie coloration dorée-brune et laissent échapper une agréable odeur de noix rôties.

Laissez-les refroidir et si elles sont trop grasses, faites-les passer sur une plaque couverte de papier absorbant pour vous débarrasser de l’excès d’huile.

Servez à l’apéritif ou utilisez-les pour relever une salade verte ou un plat de riz par exemple.

Vous pouvez bien sûr utiliser d’autres noix telles que les noisettes, amandes ou pistaches par exemple mais gardez bien en tête qu’il faut que les noix aient une taille similaire pour qu’elles rôtissent uniformément sinon certaines risquent de brûler quand les autres seront encore crues.

De même vous pouvez vous amusez avec les épices mais le paprika fumé reste mon épice favorite pour donner du caractère à ce mix de noix.

Pumpkin and Mascarpone Soup….

26 Oct

Soupe Pres Cup_4

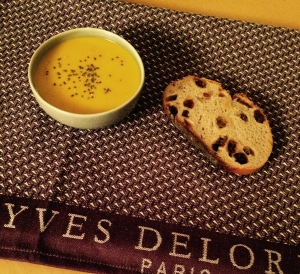
There we are….. Switching to Winter hour gave us an additional hour to sleep this week-end but also shorter days for the weeks to come!

Even if we have an amazing Autumn with bright blue sky and pretty warm weather, it’s still a bit chilly when the sun disappears.

So it just reminds us that we will soon crave for hot soups by the fireplace.

Here is my first soup of the season.

I choose the pumpkin because of Thanksgiving and Halloween…. just one idea among thousands to accommodate that squash that will decorate your house for the upcoming week.

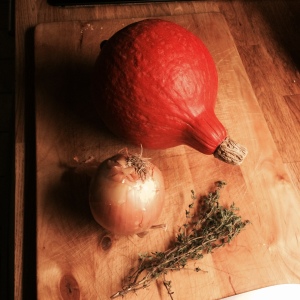
Potimarron Potimarron-Grille

Ingredients for 4 people:

  • 1 chestnut pumpkin
  • 1 onion – diced
  • fresh thyme leaves – about 1/2 tsp
  • 500ml chicken stock
  • 1/2 cup Mascarpone
  • 1/2 tsp cumin (optional)
  • olive oil
  • salt and pepper

Method:

Preheat your oven to 400°F.

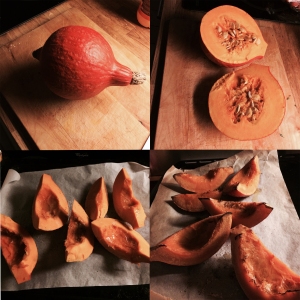
Cut the pumpkin into large wedges and scoop out the center with a spoon until you got rid of all the seeds and stringy parts.

Place them on a baking tray covered with parchment paper. Drizzle with olive oil, salt and pepper.

Grill them for 20-25 minutes until a blade gets easily through it.

Let them cool down then scoop the flesh out of the skin.

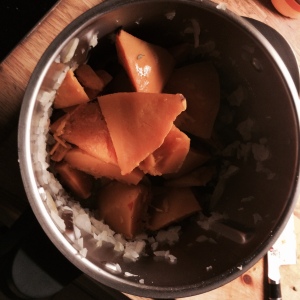
Drizzle a pan with olive oil and start to cook the diced onion with salt, pepper and cumin. When it gets soft and a nice golden coloration, add the pumpkin flesh, thyme and cover with chicken stock.

Let it simmer for 15-20 minutes then mix it with a hand blender until it gets smooth.

Roasted Pumpkin Blender

Rectify the seasoning then add the Mascarpone and mix it again.*

Serve it hot with a spoon of whipped Mascarpone, a dash of Tabasco or seeds to decorate. Soupe Pres Verrine

* If the mix is too thick, add some more stock or water and blend it again.

* If the mix is too liquid, before adding the Mascarpone, dice a peeled potato and add it to the soup. Cook it on a medium heat for 5-10 minutes then mix it again. If you have reached the right consistency, add the Mascarpone.

Soupe au Potimarron et au Mascarpone


Ingrédients pour 4 personnes:

  • 1 potimarron
  • 1 oignon émincé
  • ½ cc de feuilles de thym frais
  • 500 ml de fond de volaille
  • 125 ml de Mascarpone
  • 1/2 cc de cumin (optionnel)
  • Huile d’olive
  • Sel et poivre


Méthode:

Préchauffez votre four à 200°C.

Coupez le potimarron en 2 et ôtez toutes les graines et la partie filandreuse à l’aide d’une cuillère.

Coupez le potimarron en quartiers et posez-les sur une plaque couverte de papier sulfurisé.

Versez un filet d’huile d’olive, assaisonnez de sel et de poivre et faites cuire 20-25 minutes jusqu’à ce que le potimarron soit cuit, une lame le traverse sans résistance.

Laissez-le refroidir sur le côté.

Dans un fait-tout, faites revenir l’oignon jusqu’à ce qu’il prenne une jolie coloration dorée.

Pendant ce temps, détachez la chair du potimarron de la peau à l’aide d’une cuillère ou d’un couteau. Versez la chair du potimarron dans le fait-tout, ajoutez le cumin et couvrez avec 500ml de fond de volaille.

Laissez cuire à feu moyen pendant 15-20 minutes puis mixez le tout à l’aide d’un robot plongeant jusqu’à obtention d’une soupe onctueuse et lisse.*

Ajustez l’assaisonnement puis versez le Mascarpone et remixez.

Servez chaud avec quelques gouttes de Tabasco, une cuillère de Mascarpone fouetté ou quelques graines pour décorer.

* Si la soupe est trop épaisse, ajoutez un peu d’eau ou de fond de volaille jusqu’à obtention de la consistance souhaitée.

* Si la soupe est trop liquide, pelez et découpez en petits dés une pomme de terre et ajoutez-la à la soupe, faites cuire a feu moyen 5-10 minutes et mixez de nouveau. Ajoutez ensuite le Mascarpone.

What’s for lunch on Sunday?

12 Oct

Being in town on Sundays – rather than in the countryside – usually means there was some parties the night before. As a result, we often try to catch-up with friends for a late lunch in a comfortable place where we can enjoy being lazy for some time.
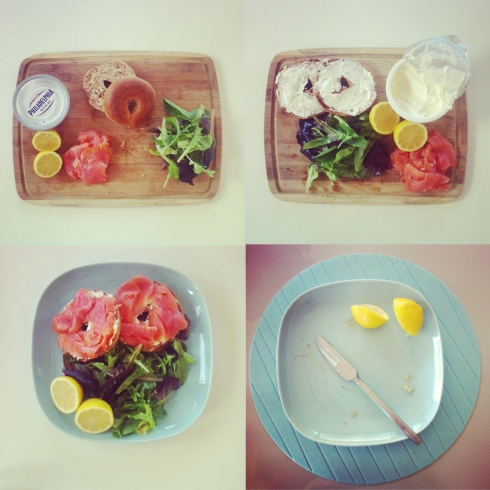
Being a bit tired, I also like simple menus…. if I am not up to a good burger, it will be a Smoked Salmon Bagel with Cream Cheese and Lemon.

Doing it yourself is very simple as well… here are a few tips:


Bagel-Salmon-Cream Cheese

Ingredients for 4 Bagels:

  • 4 fresh bagels (my favorite is with poppy-seeds on top)
  • 1 Philadelphia cream-cheese pack (not the other brands)
  • 1 lemon
  • 4 slices of high-quality smoked-salmon
  • freshly ground pepper
  • dill (optional)
  • 3-4 handfuls of mixed leaves
  • olive oil
  • salt and pepper
  • 1 lemon juice

Preparation:

As for the baguette, the best Bagels are the ones of the day. Don’t go for industrial or frozen ones, rather get them at the closest Deli selling them for really fresh and moist ones. In France, you have more and more bagel places selling them by the unit or you can also buy them at Marks and Spencer.

Only use Philadelphia cream-cheese, this is the only one to me because I am looking for a specific flavor and creaminess. In France, Monoprix sell the brand now and maybe other shops as well.

To prepare it, simply slice the bagel into 2 using a bread knife and quickly grill the bread in the toaster at a medium temperature.

Spread Philadelphia on both slices, add the smoked salmon cut into thin slices to make it easier to eat once assembled.

Grind some fresh pepper on top, press lemon juice as well, maybe spread some dill.

You can prepare a nice salad on the side. Mix olive oil, salt, pepper and lemon juice to your taste and gently toss the salad with the dressing.

Place both slices on a plate with a handful of salad on the side.

You are ready to go….. happiness is only one bite away from you.

* If you just want to get a good bagel in the street, as I told you, many places have opened but the only one that I have always loved is in the 6th district. It’s been open for years now and I still crave for the food they prep. The place is very tinny and you usually buy it to take-away:

Bagels and Brownie

12 rue Notre Dame des Champs
75006Paris


Parmesan and Rosemary Shortbreads with a Poppy-Seed Crust

5 Oct

Having a bunch of friends coming for a drink at home but only bags of crisps to propose?

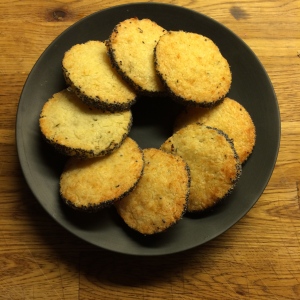
Here is a great recipe that you can prepare in advance and store in the freezer. They work like cookie dough, you cut it and bake it according to your needs.

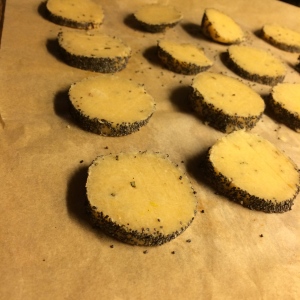
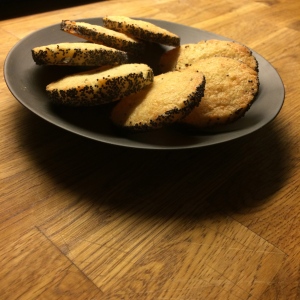
The seeds crust make it look sophisticate and the rosemary flavor will bring you back to your last holidays in the South…..

   IMG_0349

Ingredients:

  • 140g of flour
  • 100g of finely grated Parmesan
  • 100g of butter
  • a pinch of pepper
  • 1/2 tsp of fresh rosemary finely chopped

Ingredients for the crust:

  • 1 tbsp of poppy-seeds

Method:

In a bowl, combine all the ingredients and mix them with the tips of your fingers. The mix will look like powder then it will form a soft and uniform ball.

This can also be made with a Kitchen Aid, using the paddle attachment.

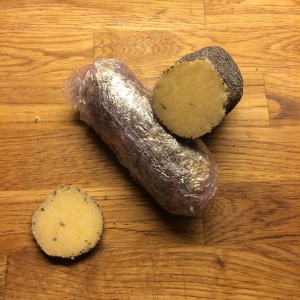
Roll the dough into logs about 4 cm diameter then roll them in poppy seeds until it creates a nice crust.

Wrap the logs in cling film and refrigerate for at least 1 hour.

IMG_0344

Preheat your oven to 180°C.

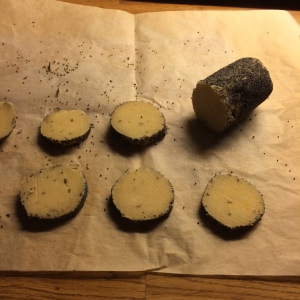
Unwrap the logs and cut them into thin slices – 3-4mm.

IMG_0343

IMG_0346

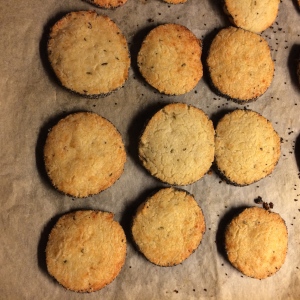
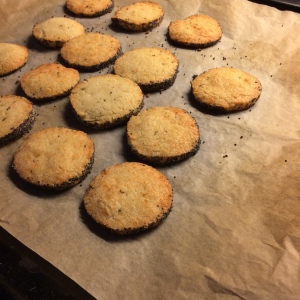
Place them on a tray covered with parchment paper or silicon mat and bake for 7-8 minutes until the edges gets a nice golden brown color.

Let them cool down until they become hard.

IMG_0348

IMG_0347

These shortbreads can keep up to one week in an airtight container.

Serve them as they are or top them with some tapenade or sun-dried tomatoes.

You can also have fun and change the flavor.

Use Pecorino instead of Parmesan, Cayenne Pepper instead of Rosemary, Sesame Seeds instead of Poppy Seeds….

IMG_0350

Sablés Parmesan-Romarin en croûte de Pavots


Ingrédients:

  • 140g de farine
  • 100g de Parmesan finement râpé
  • 100g de beurre
  • une pincée de poivre du moulin
  • 1/2 cc de romarin frais finement émincé

Ingrédients pour la croûte:

1 cas de graines de pavot

Méthode:

Dans un bol, mixez du bout des doigts tous les ingrédients. Vous allez obtenir une poudre puis en la travaillant plus longuement, vous obtiendrez une pate homogène.

Vous pouvez aussi le faire dans le bol de votre Kitchen Aid en utilisant la feuille.

Divisez la pâte en 2-3 portions et formez des rouleaux de 3-4 cm de diamètre.

Roulez-les dans les graines de pavot jusqu’à ce qu’ils soient bien recouverts.

Enveloppez-les dans du film étirable et réservez-les au réfrigérateur au moins 1 heure.

Préchauffez votre four à 180 °C.

Coupez les rouleaux en tranches de 3-4 mm d’épaisseur et disposez-les sur une plaque recouverte de papier sulfurisé ou d’un tapis silicone.

Faites-les cuire 7-8 minutes jusqu’à ce que les bords prennent une jolie coloration dorée.

Laissez-les reposer jusqu’à ce que les sablés durcissent.

Vous pouvez les conserver jusqu’à une semaine dans une boîte hermétique et à l’abri de l’humidité.

Middle-Eastern Almond and Orange Cake with Orange Blossom Water Syrup

15 Sep

After a few months away from the blog…. I am back, hopefully on a regular basis and with fresh ideas to share with you.

As I spent a few months as a Chef at Cafe Pinson which is a gluten-free, dairy-free & vegetarian restaurant (with raw and vegan options…. ), I thought it would be great to start with a gluten-free recipe which is also one of my favorite deserts that I used to prepare in London.  

This cake is very smooth and rich in flavor as well as atypical…. Indeed, there is no butter, milk or oil… the texture comes from the boiled orange puree and the ground almonds. The syrup makes it easy to preserve for a few days and the optional chocolate layer will definitely make the difference….

7-Slices

INGREDIENTS FOR THE CAKE

  • 4 oranges washed
  • 375 g caster sugar
  • 575g almond powder
  • 9 eggs
  • 1 tbsp baking powder
  • 75 ml orange blossom water

INGREDIENTS FOR THE SYRUP

  • 225ml orange juice
  • Zest of 2 oranges cut into julienne
  • 225 g caster sugar
  • 75 ml orange blossom water

INGREDIENTS FOR THE YOGURT

  • Greek Yogurt
  • Homemade Orange Peel  cooked in the syrup

METHOD FOR THE CAKE

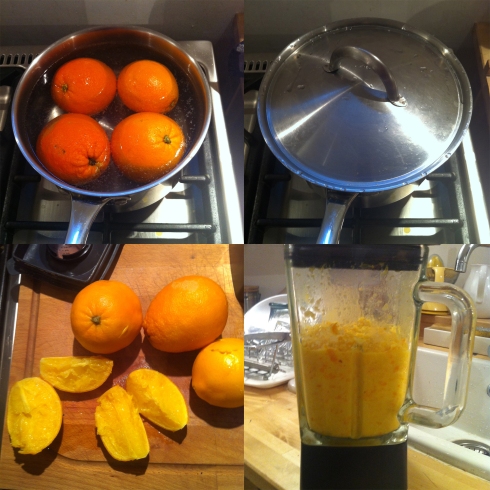
Place the oranges in a deep pan and cover them with water. Bring to the boil and cook with the
lid on for 30-40 minutes at least then remove them from the pan and let them cool down for another
20 minutes.
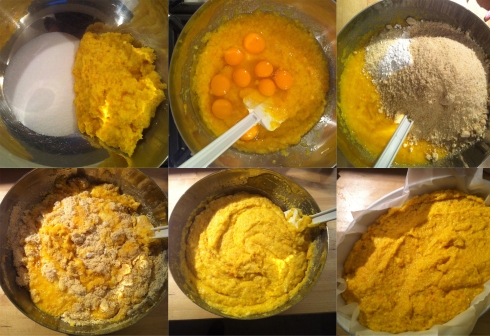
Cut them in halves and remove the seeds then place them in a food processor and add
the sugar. Process 30 seconds then add almonds, eggs, baking powder and 75ml of rose
water and process another 10 seconds.

1-Boiled Orange

Pour the mixture into a 30 cm spring form cake tin lined with baking paper and bake 60
minutes at 180º.
Let the cake cool in the tin.

2-Mix Cake

METHOD FOR THE SYRUP & PRESENTATION

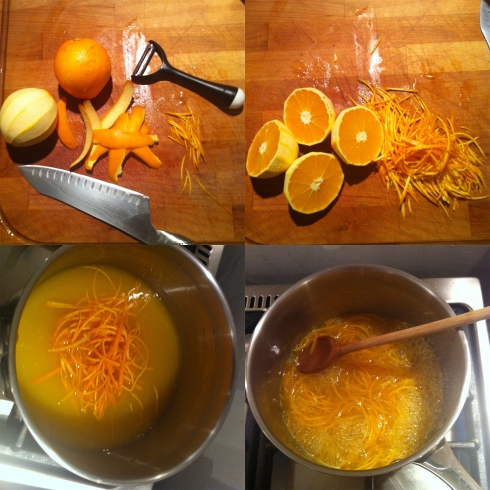
Put all the ingredients except orange blossom water in a pan over a low heat and slowly bring to the
boil and simmer til syrupy. Remove from the heat and add the orange blossom water.
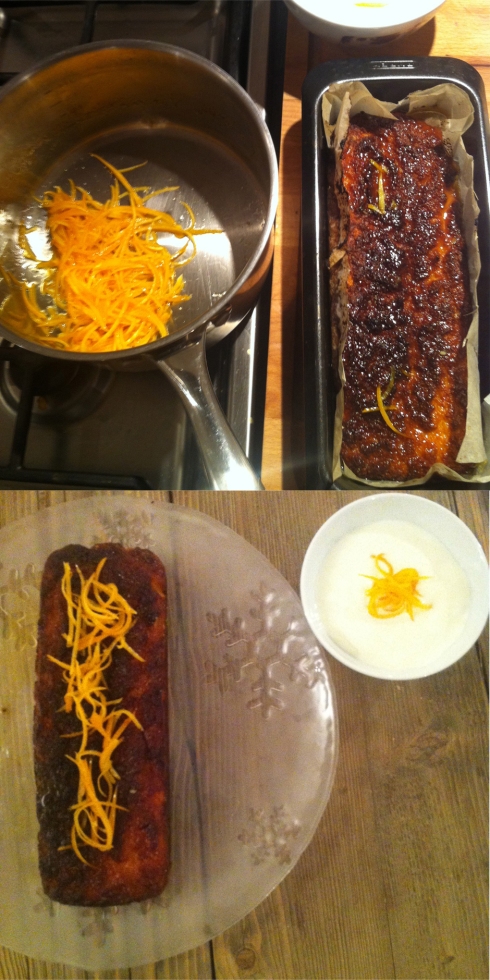
Pierce the cake with a skewer and pour the syrup on top of the cake.

3-Sirop

Serve each slice with a generous spoon of Greek Yogurt on which you will sprinkle the orange peel that you cooked with the syrup.

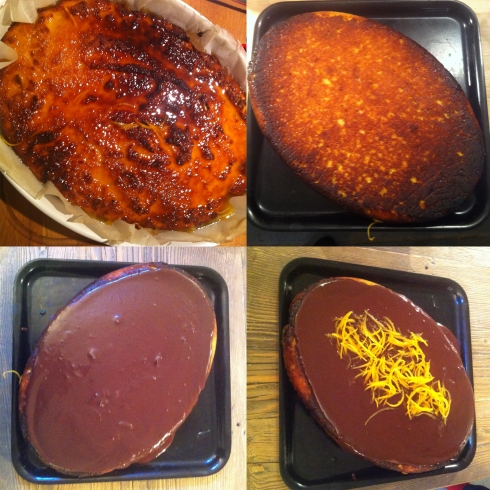
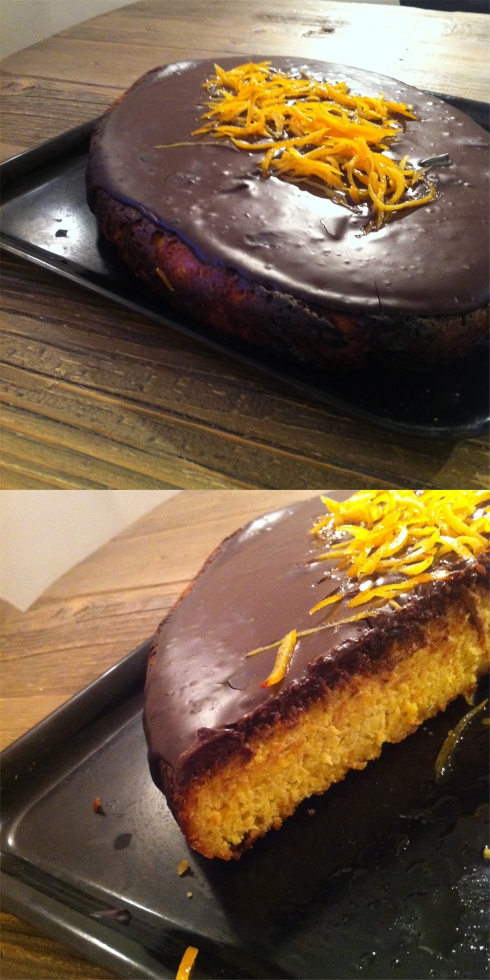
4-Result

5-Result with Choco Ganache

Gâteau Oriental à l’Orange et aux Amandes

& son Sirop de Fleur d’Oranger

INGREDIENTS

  • 4 oranges lavées
  • 375 g de sucre
  • 575g d’amandes en poudre
  • 9 oeufs
  • 1 cas de levure chimique
  • 75 ml de Fleur d’Oranger

INGREDIENTS POUR LE SIROP

  • 225ml de jus d’orange
  • Zest de 2 oranges en julienne
  • 225g de sucre
  • 75 ml de Fleur d’Oranger

INGREDIENTS POUR LE YAOURT

  • 1 pot de yaourt grec
  • des écorces d’orange confites ou du gingembre confit

METHODE POUR LE GÂTEAU

Recouvrir de papier sulfurisé la base d’un moule a fond amovible de 30 cm de diamètre et enduire les bords de beurre mou a l’aide d’un pinceau de cuisine de la base vers l’extérieur.
Prechauffer le four a 180°C.
Mettre les oranges dans une grande casserole et les recouvrir d’eau. Porter à ébullition
et cuire à couvert au moins 30-40 minutes. Laisser reposer 20 minutes.
Couper les oranges en 2, ôter les pépins et passer les oranges au blender jusqu’à obtention d’une purée. Ajouter le sucre et blender 30 secondes.
Transférer dans un saladier et ajouter les amandes, les oeufs, la levure et la fleur d’oranger.
Verser le mix dans le moule et cuire 1H jusqu’à ce que la lame d’un couteau sorte nette.

6-Sliced

Apple Crumble with Raspberry Jam

9 Feb

    It’s been a few years since I started this blog now and I just realized that one of my favorite recipe is missing.
And such a well-known one….! The Crumble…..
Of course you have thousands of variations on the crumble and I have mine as well but I keep it pretty simple and if you happen to be short on almond powder and/or can’t find raspberries, just deal without it! Replace almond with flour and raspberries by whatever you like and maybe just a couple more apples!
What we need to keep in mind is just that we want to enjoy the combination of the crunchy crumbs and the melting cooked fruits….!

1-Apple

Ingredients for 8-10 people

For the fruit base:

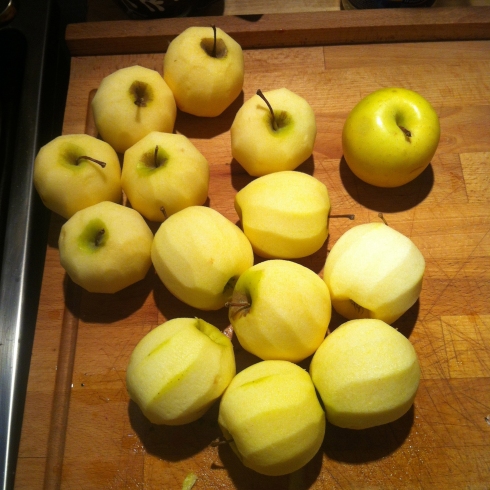
  • 12-14 small cooking apples, peeled, cored and cut into quarters or cubes
  • 100g of butter
  • 1/2 cup of honey or maple syrup
  • 1/2 cup of sugar
  • 400g of raspberries fresh, frozen or in a jam (in that case, don’t put the sugar and reduce the honey to 1/3 cup)
  • 1 tsp of cinnamon
  • the seeds of a vanilla pod

For the crumble:

  • 200g of butter cut into dices
  • 200g of almond powder
  • 200g of flour
  • 75g of sugar

Method:

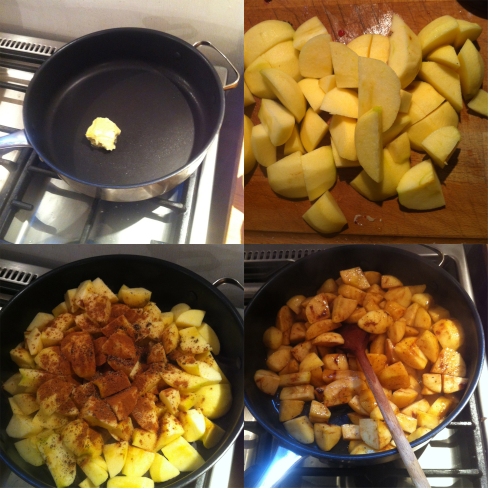
In a large pan, melt the butter and start to cook the apples on medium heat.
Add the honey, sugar, cinnamon, vanilla seeds and cover with a lid. Stir from time to time until the apples start to soften.

2-Apples Cooking

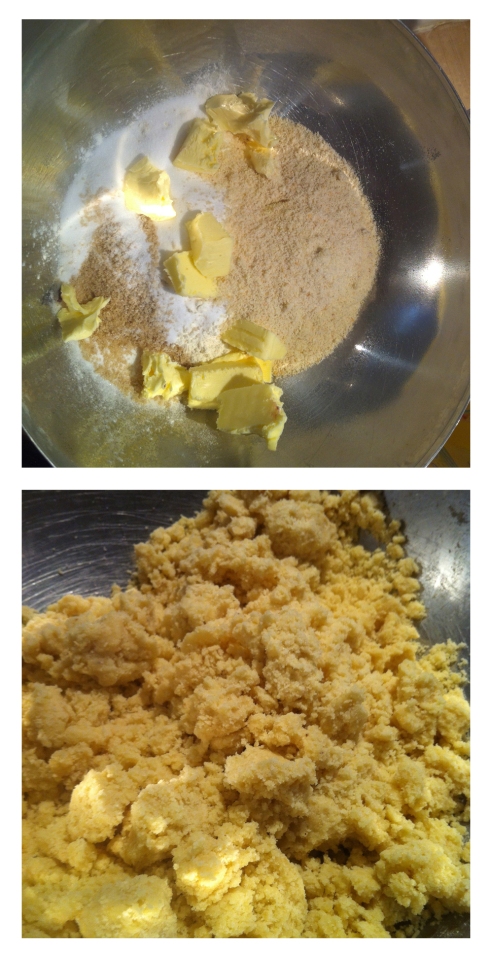
In the meantime, prepare the crumble mix. In a bowl, mix together by hand all the ingredients until you obtain nice crumbs. If you keep working the mix it will become a dough. You have to stop just the step before.

3-Crumbles

Preheat your oven to 180.
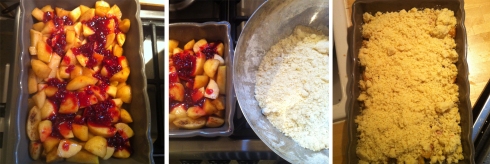
When the apples are slightly cooked, pour them in a oven dish. Add the raspberries or raspberry jam on top and swirl them in or cover them with some more apples.
Layer evenly the crumbs on top and bake for 30-40 minutes until the top gets a nice golden brown color.

4-Layers

Serve it hot or cold with cream, ice-cream or custard.

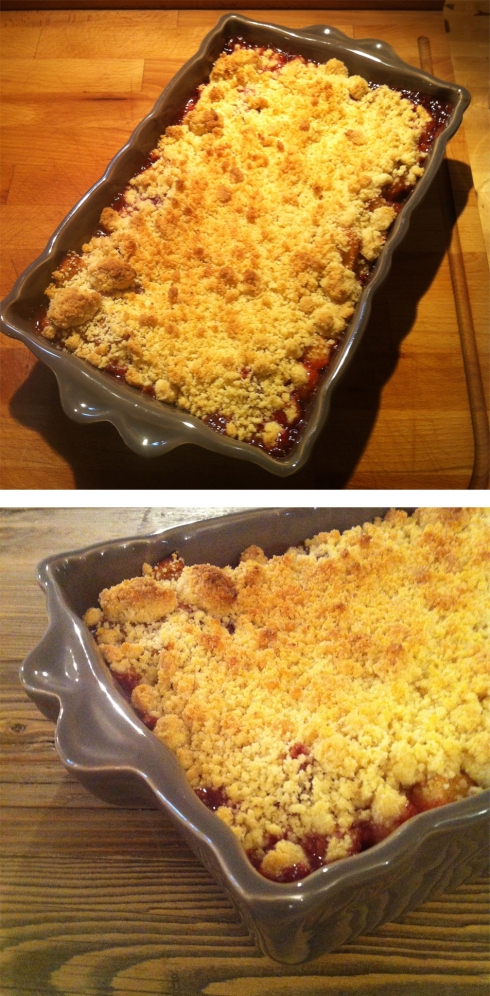
5-Resultat

Crumble Pommes Framboises

Ingredients pour 8-10 personnes

Pour la base aux fruits:

  • 12-14 petites pommes pelées, coupées en quartiers ou en cubes
  • 100g de beurre
  • 100ml de miel ou de sirop d’érable
  • 120g de sucre
  • 400g de framboises fraiches ou surgelées ou en confiture (dans ce cas, retirez le sucre et réduire la quantité de miel à 75ml)
  • 1cc de cannelle en poudre
  • les graines d’une gousse de vanille

Pour le crumble:

  • 200g de beurre coupés en dés
  • 200g d’amandes en poudre
  • 200g de farine
  • 75g de sucre

Méthode:

Dans une grande casserole, faites fondre le beurre et commencez à cuire les pommes en ajoutant le miel, le sucre, la cannelle et la vanille. Couvrez et laissez cuire sans trop remuer pour éviter l’effet compotée et garder le fruit intact.
Préchauffez votre four à 180°C.
Préparez le crumble. Dans un saladier, travaillez à la main tous les ingrédients jusqu’à obtention de grosses miettes, les crumbles. Si vous travaillez trop le mix, vous obtiendrez une boule de pâte et si vous ne le travaillez pas assez, le mix sablera mais ne formera pas de petites boules.
Répartissez les pommes dans un plat allant au four et dispersez les framboises ou la confiture à la surface. Incorporez-les en sillon à l’aide d’une cuillère ou recouvrez-les ensuite d’une autre couche de pommes.
Dispersez ensuite les crumbles à la surface pour obtenir une couche homogène.
Faites cuire au four 30-40 minutes jusqu’à ce que la surface prenne une jolie coloration dorée.
Servez chaud ou froid, avec de la crème, de la glace ou une crème anglaise.

Chicken Olives (Paupiettes) with Ricotta, Tartufata and Pinenuts

6 Jan

 This recipe is especially written for my friend Camille who seemed to want to give it a try as she soon will get married. Yes indeed, she wants to broaden her recipe folder to become a perfect housewife…. just kidding of course, she’s just a real foodie and when she read it was stuffed with ricotta and tartufata, she wanted to know the recipe!

Also I wanted to write about that recipe because it is one of the techniques I have been teaching dozens of time at the Cookery School and my clients have always been delighted and eager to do it again at home.

If you are scared of using caul fat, I’ll write a couple of options to get through the recipe without it. Especially if you can’t use pork or if you live abroad as it might be difficult to source it even if you have a traditional butcher!

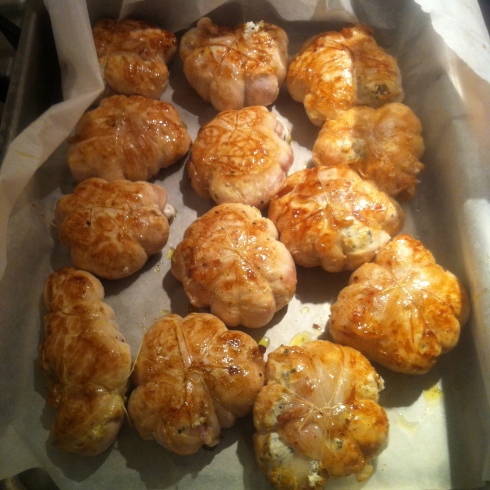
photo 2(4)

 Ingredients for 6 people

  • 6 chicken breasts – ask your butcher to get them flat like for a Milanese Scallop
  • 300g of Ricotta
  • 1tbsp of tartufata (black truffle sauce)
  • 1/2 cup of toasted pinenuts, roughly chopped
  • salt and pepper
  • caul fat*
  • butcher string
  • butter and oil for the pan
  • white wine to deglaze
  • butter and cream for the sauce
  • herbs for decoration such as flat parsley or chervil

Method:

In a bowl, mix together the Ricotta, tartufata, pine nuts and season with salt and pepper.
Taste and rectify the seasoning.

1-Garniture

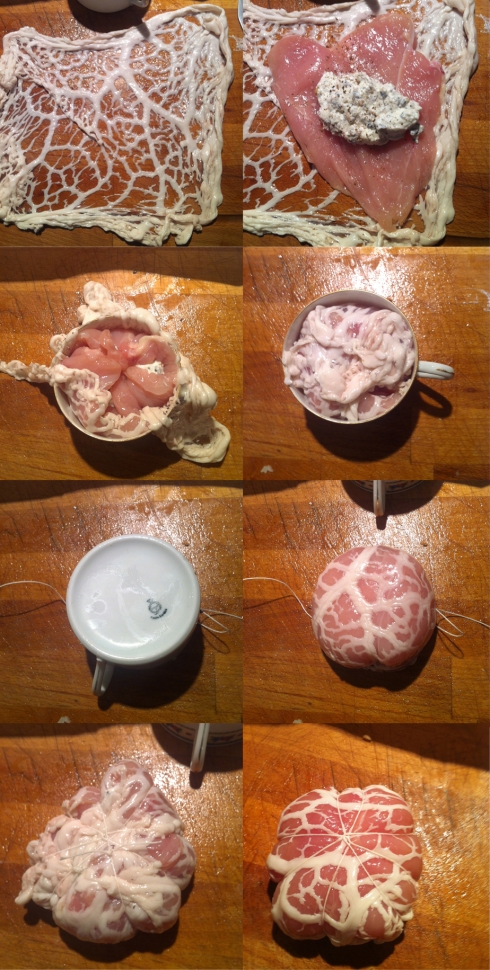
Cut a piece of caul fat slightly bigger than the scallop.
Lay it flat on a clean surface, season your chicken with salt and pepper and lay it on top of the caul fat.
At that stage you can transfer both the chicken and caul fat in a small bowl, ring or cup to help you getting the right shape.
Add a spoon of the ricotta mix in the center and fold back the chicken on top then the caul fat. Tear apart the excess of caul fat then place the string on the working surface and turn the bowl upside down to place the paupiette on top.
Now, do as you do when you are gift wrapping and get the paupiette well sealed by the string.

2-Crepine-Paupiette

If you have an excess of ricotta mix, keep it to create a nice sauce.
Preheat your oven to 180°C.
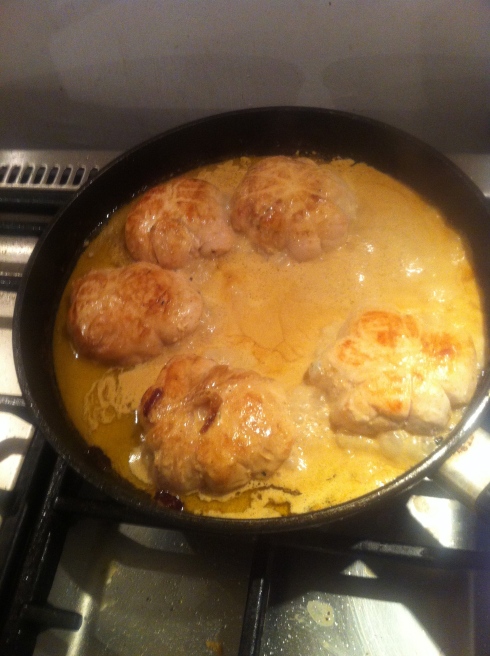
Once you have prepared all the paupiettes, heat a pan just big enough for the 6 paupiettes to fit in. Add a tbsp of oil and butter and when it is hot enough to sear your meat, place the paupiettes in, next to each other.
Give them a good golden brown coloration and turn them upside down to do the same on the other side.
Get rid of the excess of fat.
If your pan can get in the oven, deglaze it with 1/2 cup of white wine and finish the cooking of the paupiettes for 15-20 minutes. The wine will keep them moist in the oven.

3-Cooking Paupiettes
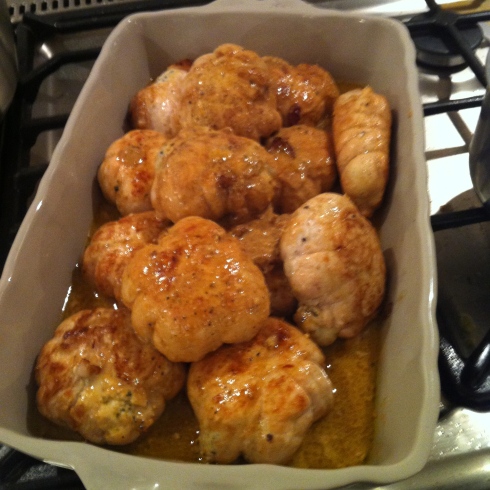
If it doesn’t, transfer them in an oven dish and cook them for another 15-20 minutes. Deglaze the pan with1/2 cup of white wine and pour it on top of the paupiettes.

IMG_6312
You can cover the paupiettes with foil to keep them very tender.
Before serving, remove the paupiettes from the pan and using the juice they released, start to create the sauce. Add the ricotta leftover if you have some then add 1/2 cup to 1 cup of cream and 1tbsp of butter. Let it reduce a little and season with salt and pepper.

IMG_6313

You can serve the sauce like that on top of the paupiette or in a saucer on the side or if you want it silky, pass it through a thieve to get rid of any ricotta and truffle bits as well as the pinenuts.
With a knife or scissors, cut the string and remove it.

IMG_6319

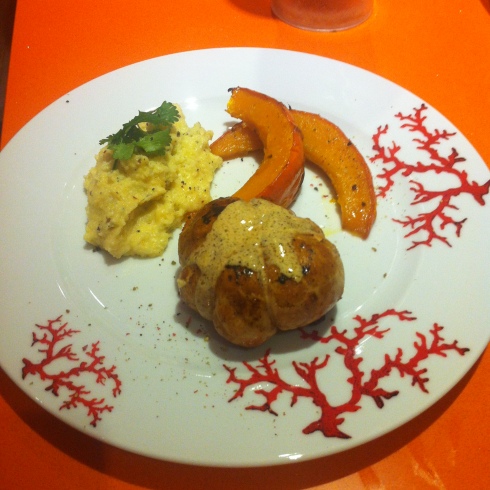
Place the paupiette in the middle of the plate and pour a little sauce on top. Decorate with fresh herbs and serve it straight away. You can also enhance the colour by spreading crushed pink peppercorn on top or Piment d’Espelette powder.
You can also cut it into two and place one half on the other in an angle.

*If you don’t want to use caul fat, simply change the shape of your paupiette and make it longer and in a shape of a tube so that you can seal the ricotta as well as you are able to. The caul fat helps to keep the whole paupiette together but if you are careful enough to fill the scallop with the appropriate amount of mix, you can deal with the string only. You can see the result on the picture on top or even better on the third one on top.

Paupiettes de Poulet a la Ricotta, Tartufata et Pignons de Pin

Ingrédients pour 6 personnes:

  • 6 escalopes de poulet – demandez a votre boucher de les aplatir comme pour des escalopes milanaises
  • 300g de Ricotta
  • 1 cas de tartufata
  • 1 petite poignée de pignons de pin torréfiés et grossièrement hachés
  • sel et poivre du moulin
  • crépine de porc
  • ficelle de boucher
  • huile et beurre pour la poêle
  • vin blanc pour déglacer
  • crème et beurre pour la sauce
  • herbes fraîches pour décorer ( persil plat, cerfeuil…)

Méthode:

Dans un bol, mixez la ricotta, la tartufata et les pignons. Assaisonnez de sel et de poivre, réservez.
Découpez la crépine en morceaux un peu plus grands que les escalopes.
Assaisonnez les escalopes et placez-les au dessus de la crépine.
Vous pouvez placez la crépine et l’escalope dans un cercle ou un petit bol pour obtenir une belle forme de paupiette.
Déposez une cuillère de mix de ricotta au centre et refermez la paupiette avec l’escalope puis la crépine. Coupez l’excès de crépine et retournez la paupiette sur le fil de boucher.
Comme pour un emballage cadeau, utilisez la ficelle pour bien maintenir la paupiette en lui donnant 4 tours.
Réservez.
Faites préchauffer votre four à 180°C puis chauffez une poêle pouvant contenir les 6 paupiettes  avec un peu de beurre et d’huile. Quand celle-ci est bien chaude, déposez les paupiettes et donnez leur une belle coloration dorée brune.
Retournez-les pour colorer l’autre côté.
Jetez l’excès de gras et déglacer la poêle au vin blanc pour créer le fond de sauce et garder les paupiettes tendres pendant leur cuisson au four. Placer la poêle au four 15-20 minutes ou si celle-ci n’est pas adaptée au four, débarrassez les paupiettes et le fond de sauce dans un plat.
Recouvrez éventuellement de papier aluminium.
A la fin de la cuisson, récupérez le jus de cuisson et ajoutez le reste de ricotta à la truffe si vous en avez. Allongez avec un peu de crème et de beurre à feu moyen. Laissez réduire, rectifiez l’assaisonnement et utilisez tel quel ou passez la sauce au chinois si vous voulez une sauce soyeuse.
A l’aide d’un couteau ou de ciseaux, ôtez la ficelle des paupiettes. Placez chaque paupiette au milieu de l’assiette et recouvrir d’un filet de sauce. Décorez avec un brin d’herbe fraîche et éventuellement des brisures de baies roses ou de Piment d’Espelette pour la couleur.
Vous pouvez aussi coupez en 2 la paupiette et la servir en posant une moitié en travers de l’autre afin de mettre en valeur la garniture.

Local and Seasonal Winter Salad with Endives, Pears and Mountain Cheese

28 Dec

Winter time in Serre-Chevallier…. I am cooking for a nice family of foodies expecting quality food with local and seasonal products….. just what I love!

Of course, they expect meals more sophisticated than Cheese Fondue, Raclette or Tartiflette…. otherwise, they would go to the restaurants rather than hiring a chef.

Let’s be inventive then…. and propose an alternative to the classic apple, walnut and endive salad.

Today, I decided to replace apples with pears and create a nice dressing with fried bacon strips, walnuts, cider vinegar and Dijon mustard to bring lots of flavor to the salad. And as a final touch, rather than a classic Emmenthal or colorful Mimolette shavings, I used a young Tomme de Savoie to bring some more texture to that crunchy salad.

Want to give it a try?

Let’s start then!

4-Endives, Pears and Dressing

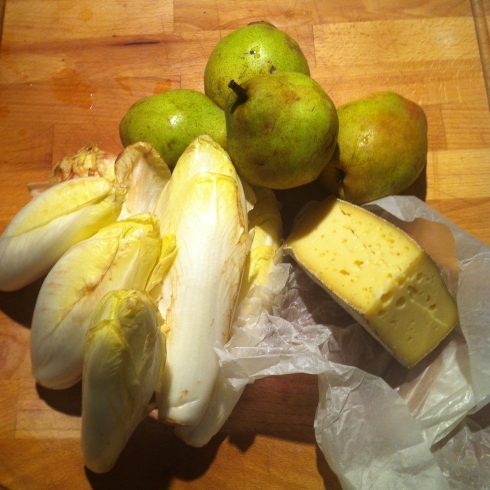
Ingredients for 6-8 persons:

  • 6 endives medium size
  • 4 pears, neither too ripe nor too firm
  • a handful of walnuts
  • 150-200g of bacon strips
  • 150g of Mountain Cheese such as a young Tomme de Savoie
  • 1 tbsp of Dijon Mustard
  • Cider Vinegar
  • Vegetable Oil
  • Salt and Pepper

2-Pears, Endives, Tomme

Method:

If you prepare the salad slightly in advance, have a juiced lemon at hand to pour on top of the sliced endives and pears so that they do not oxidized and become brownish.

Prepare the garnish:

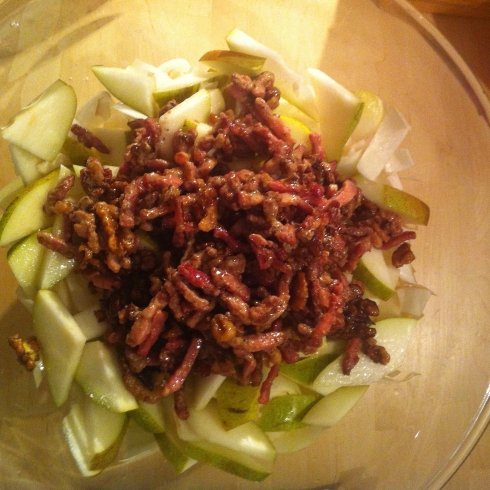
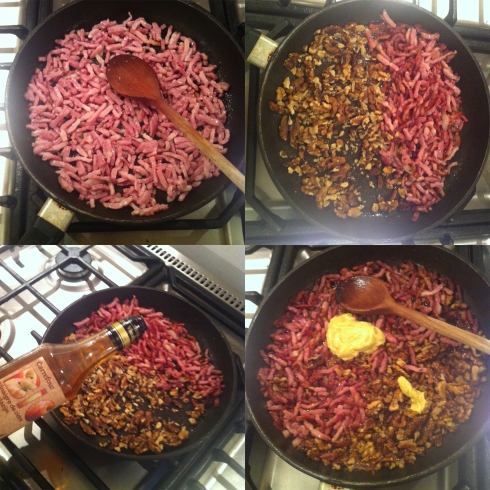
In a frying pan, pour the bacon strips and turn the heat on. When it start to make lots of noise, the bacon starts to get a nice coloration. Give them a good shake or stir them and let them cook longer until they get evenly cooked and crusty.

Gather them on one half of the pan and pour the hazelnut on the other half to roast them slightly on low heat.

Deglaze with Cider Vinegar -about 2-3 tbsp- until it evaporates then turn the heat of and add 1 tbsp of mustard, a little more vinegar and 2-3 tbsp of oil. Stir the whole mix until the bacon and walnuts get evenly coated with the dressing. Let it rest on the side.

Garniture

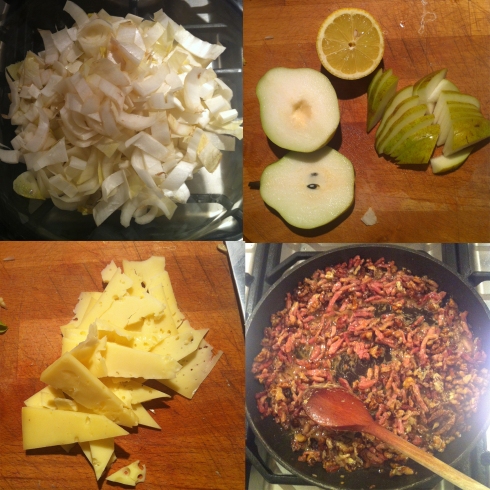
Wash the endives and remove the surrounding leaves if they don’t look good. Cut the endives lengthways and remove the center in a shape of a pyramid. Slice them into 1 inch stripes and set aside in a large bowl with lemon juice on top.

Wash the pears and cut them into quarters, remove the center and cut them into thin slices about 2-3mm. Set them aside on top of the endives with lemon juice on top.

At last prepare the cheese. Remove the rind then cut it into thin slices – about the same size as the pears. Keep it at hand.

3-Ingredients Prepares

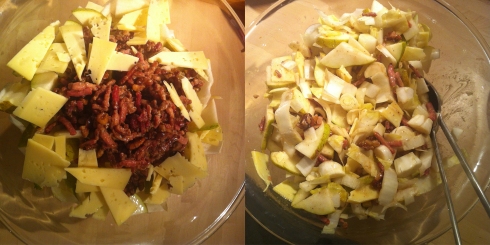
Once ready to serve, pour the dressing with the walnuts and bacon on top of the endives and pears then spread the cheese on top.

Bring it to the table and toss it.

5-Assemble and Toss

Salade d’Endives, Poires, Noix et Fromage de Montagne

Ingrédients pour 6-8 personnes:

  • 6 endives de taille moyenne
  • 4 poires, ni trop mures, ni trop fermes
  • une poignée de noix
  • 150-200g de lardons
  • 150g de fromage de montagne tel que la Tomme de Savoie
  • 1 cas de Moutarde de Dijon
  • Vinaigre de Cidre
  • Huile végétale
  • Sel et Poivre

Méthode:

Si vous préparez cette salade en avance, préparez un jus de citron pour le verser sur les endives et les poires afin d’éviter que celles-ci ne s’oxydent au contact de l’air et ne brunissent.

Préparez la garniture :

Faites revenir le bacon dans une grande poêle à feu moyen. Quand ils commencent à grésiller, remuez un peu afin de les dorer uniformément. Laissez-les revenir jusqu’à ce qu’ils prennent une belle couleur dorée-brune et soient croustillants.

Poussez-les sur une moitie de la poêle et parsemez l’autre moitié de noix pour les torréfier 2-3 minutes à feu doux.

Déglacez le tout avec 2-3 cas de vinaigre de cidre jusqu’à ce qu’il s’évapore. Hors du feu, ajoutez une généreuse cas de moutarde, un peu plus de vinaigre et 2-3 cas d’huile pour créer la vinaigrette. Mélangez bien pour que les noix et les lardons soient bien enrobés et laissez reposer.

Lavez les endives et débarrassez-les des feuilles abîmées. Coupez-les en deux dans le sens de la longueur et ôtez le cœur en forme de pyramide. Emincez-les en lanières, placez-les dans un grand saladier de 2-3mm et arrosez-les de jus de citron.

Lavez les poires et coupez-les en quartiers. Otez le centre et coupez-les en tranches fines de 2-3mm. Arrosez-les de jus de citron et placez-les au dessus des endives.

Pour le fromage, ôtez la croute et coupez-le en fines lamelles de la taille des poires. Gardez-les a portée de main.

Au moment de servir, versez la garniture-assaisonnement sur les endives et les poires puis parsemez de lamelles de fromage.

Apportez le plat a table et servez après avoir pris le temps de bien fatiguer la salade pour que la garniture imprègne les endives et les poires.

There’s something about Mushrooms…

4 Dec

The season is almost gone and I still did not write about them….. the mushrooms.

Usually, you either love them or hate them, you fear the idea of picking mushrooms because you might pick toxic ones or love the idea of looking for your dinner in the wood!

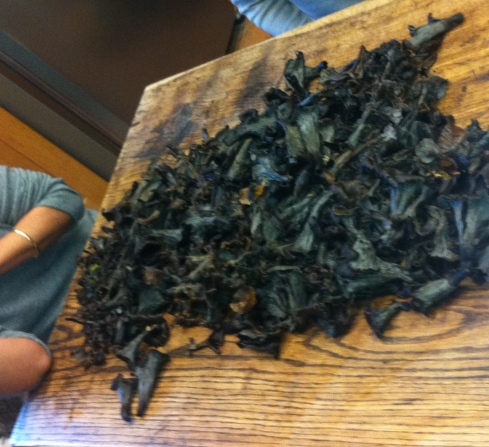
We are lucky enough to be surrounded with woods at my Dad’s home and even more lucky to have great spots for mushrooms such as chanterelles, ceps, “trompette de la mort” and “pieds de mouton”.

Indeed, some years are really crazy and we have to throw away some of them, we cook them, we dry them, we freeze them and we offer a lot to our relatives.

This year was so-so, just enough for our great family even if we wish there was more ceps.

Here is a few ideas to cook them and match them and also a few tips to cook them the right way.

Autumn 2 Autumn 3 Autumn

Simply Mushrooms:

  • wild mushrooms
  • salt and pepper
  • butter and oil
  • a garlic clove crushed
  • freshly chopped herbs

Recolte

First of all, you need to clean the mushrooms and this step takes quite some time….. Get your friends, cousins, sister-in-law….. sit in the kitchen with a good cup of tea or glass of wine and get started.

You never wash the mushrooms, they are essentially made of water and if they rest in it, they will loose all their flavor.

Using your hands, a brush or a tea towel, remove any leaves, earth or insects.

Get a great pan and drizzle with oil and a good spoon of butter, once the butter is melted, add the mushrooms and the garlic if you want more flavor. Season with salt and pepper. The pan can look overloaded, the mushrooms will quickly release all the water and shrink tremendously.

Do not throw away the water, most of the flavor is in it, the mushrooms will be tasteless if you do that!

Cook them on medium heat until the water has evaporated. Stir from time to time.

The mushrooms are ready once they melt in your mouth. There is no more sensation of biting something raw and chewy.

Just before serving, you can spread chopped herbs on the mushrooms and cook them another 2-3 minutes.

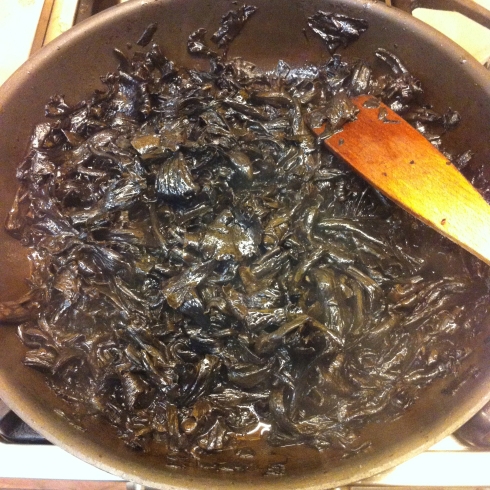
Trompette des Morts Cuites

Trompette des Morts

Pieds de Mouton

Pieds de Mouton

Other ways to cook Mushrooms:

Chanterelle, Bacon and Linguine

The Chanterelle, Bacon and Linguine Recipe

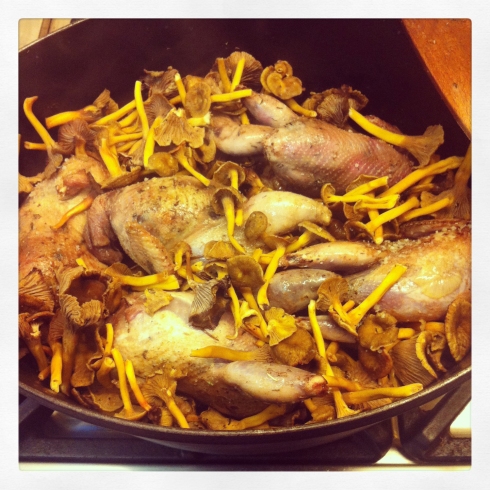
Partridges and Chanterelles

You can also cook them with poultry or meat. Once you have sealed the poultry or beef and start cooking it, spread the mushrooms around it and let them cook. They will bring more flavor and also benefit from the flavor of the poultry or beef.

Simply check from time to time that the mushrooms do not burn. It may happen with long cooking times, the water fully evaporates. Simply add some stock, white wine or water.

Perdreaux et ChanterellesPartridges and Chanterelles

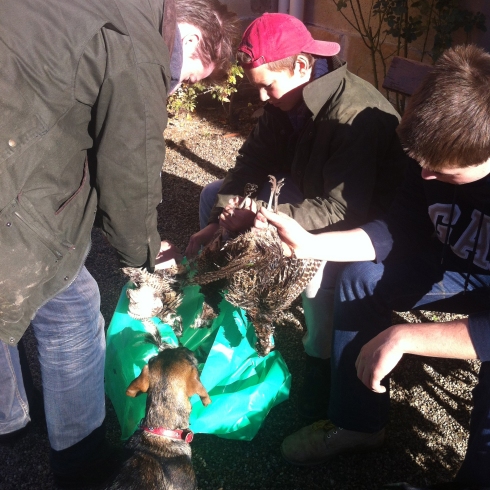
in that case you also have to pluck the birds…..

Plumage