Archive | Cookbook RSS feed for this section

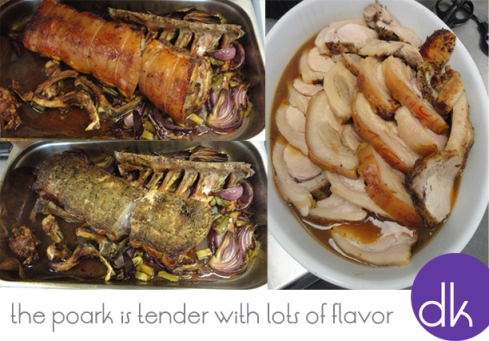
Roasted Pork with Red Onions and Balsamic Potatoes

2 Nov

I tried that recipe last year in London, they use pork all the time, from bacon for breakfast til sausages for dinner!

You may think about Fish & Chips when you travel to the UK but trust me, pork is also omnipresent! As I am not very used to cook pork, I went through a pile of cooking book and realized that the best way to succeed was to follow Jamie Oliver recipe.

I found it in Jamie at Home:

His recipes are simple and honest and he really makes it easy for anybody who does not know how to cook or just try a recipe for the first time.

My concern was to overcook/undercook the pork which in both case is a disaster but in the end I succeeded. That’s why I wanted to share that recipe with you. The Balsamic component makes it really different from the traditional roast pork and potatoes or the recipe from Normandie in which you use cream, apple and cider. You all start to know how much I love Mediterranean dishes… once again, let’s bring a touch of Italian flavor!

Basically, I did not change a lot of things from the cookbook as everything went well! I also add Jamie’s note….

“This dish has attitude – it uses a lot of balsamic vinegar but, trust me, it works really well. The onions and potatoes are baked in the vinegar, making them crispy, dark, sticky and sweet. I’ve chosen to serve them with roast pork, but beef or lamb works just as well. I prefer red onions for their color and sweetness.”

Ingredients for 6-8:

For the Potatoes

  • 1.5kg baby potatoes washed
  • sea salt and freshly ground black pepper
  • olive oil
  • 200g butter, cubed
  • a bunch of fresh rosemary, leaves picked and chopped
  • 1 whole bulb of garlic, quartered or smashed
  • 5 medium red onions, peeled and quartered
  • 350ml cheap balsamic vinegar

For the Pork

  • a small bunch of fresh rosemary, leaves picked and finely chopped
  • 2 tbsp freshly ground fennel seeds
  • 1.5kg boneless rolled pork loin, preferably free-range or organic, skin off, fat scored in a criss-cross pattern
  • olive oil
  • 6 cloves of garlic, crushed
  • 1 medium red onion, peeled and quartered
  • 2 sticks of celery, trimmed and chopped
  • 4 bay leaves
  • 2 glasses of white wine
  • extra-virgin olive oil


Method

Preheat the oven to 200C/380F.

To prepare the meat, scatter a handful of finely chopped rosemary leaves over a large chopping board. Sprinkle over some salt, pepper and the ground fennel seeds. Roll the pork across the board, pressing down hard so all the flavorings stick to it.

Get a roasting tray large enough for your pork and place it on a hob over a medium-high heat. Drizzle with olive oil and place the pork in, fat side down, sprinkled with any flavorings remaining on the board.

After a few minutes, when the pork fat is lightly golden, turn it over and add the garlic cloves, onion, celery and bay leaves to the tray. Place on the bottom shelf of your preheated oven for an hour, basting it halfway through. (For the last 20 minutes of cooking, you might need to cover the pork with greaseproof paper to stop it coloring too much.)

Get another roasting tray, into which you can fit the potatoes in one layer. Pour a glug of olive oil into it and add the butter, rosemary and garlic. Toss the potatoes in all the flavors.

Add the onions and all the balsamic vinegar and season with salt and pepper. Place the tray on the top shelf of your oven and cook for about 50 minutes, until the potatoes and onions are dark, sticky and crispy – removing the tray to toss the onions and potatoes halfway through.

After an hour, the meat should be cooked. Prick it with a sharp knife – if the juices run clear, it’s done; if not, pop it back in the oven for another 10-15 minutes, keeping the potatoes warm.

Remove it from the oven and let it rest on a plate for 10 minutes. Pour away most of the fat from the tray and mash up the garlic and onion. Place the tray over the hob and add the wine. Simmer until the liquid has reduced by half, scraping all the meaty goodness off the bottom to make a tasty sauce, and season if necessary. Pass through a sieve into a serving jug. Then slice the pork and serve it with the baked onions and potatoes, drizzled with the pan juices.

Great with some nice greens or a rocket salad… as usual!

Radish and Broad Beans Salad with Giant Couscous

13 May

As you all know by now, I am fond of Yotam Ottolenghi’s way of cooking. He’s never afraid of mixing spices and odd ingredients in order to create tasty and colorful dishes.

As spring time brings us back tasty greens and peppery radishes, it is just the right time to write about that salad.

As usual, I slightly adapt the recipe. Today, there’s nothing really different except for the fact that I add wholewheat giant couscous to make it more consistent. As a consequence, I do not serve the salad with Pita bread. I just find it healthier, different and also perfect if you want to prepare it for your lunch box!

I also use giant couscous because it recently became my new favorite ingredients as an alternative to couscous, bulghur, pasta, rice and other ingredients that we are used to cook and sometimes bored with. The giant couscous has that perfect round shape and funny consistency once cooked that makes it different and makes your salad more interesting for a change.

If you never tried it, give it a chance and if you like it as much as me, use it hot or cold, with pesto dressing, grilled vegetables, nuts, dried fruits, cherry tomatoes, cucumber, fennel and as many spices as you like!

Ingredients for 4 people

  • 200g of wholewheat giant couscous
  • 500g shelled broad beans, fresh or frozen*
  • 350g small radishes
  • 1 small red onion, thinly sliced
  • 2 tbsp finely chopped coriander
  • 1/2 preserved lemon, finely chopped
  • juice of 2 lemons
  • 2 tbsp chopped flat-leaf parsley
  • 3 tbsp olive oil
  • 1 tsp ground cumin
  • 200ml Green tahini sauce (see below)
  • salt and black pepper

Ingredients for the Green tahini sauce**

  • 150ml tahini paste
  • 150ml water
  • 80ml lemon juice
  • 2 garlic cloves, crushed
  • 1/2 tsp salt
  • 30g flat-leaf parsley, finely chopped if making by hand

Method for the Green Tahini Sauce

In a bowl, thoroughly whisk the Tahini, water, lemon juice, garlic and salt together. The mixture should be creamy and smooth. If it is too thick, add more water. Stir in the chopped parsley, then taste and add more salt if needed.
If using a food processor or a blender, process together all the ingredients except the parsley until smooth. Add more water if needed. Add the parsley and turn the machine on again for a second or two. Taste for seasoning.

Method for the Salad

Bring a large pan of salted water to a boil and cook the giant couscous for 7-9 minutes depending the instructions on the box. Drain in a colander and place under cold running water to get it cold and stop it from further cooking. Drizzle a little olive oil on top and set aside.
Place the broad beans in a pan of boiling water and simmer for 1–2 minutes, depending on size. Drain through a large colander and rinse in plenty of cold water to refresh them. Remove the beans from their skins by gently squeezing each one with your fingertips.
Cut the radishes into slices 1-2mm and mix them with the giant couscous, broad beans, onion, coriander, preserved lemon, lemon juice, parsley, olive oil and cumin. Season with salt and pepper to taste.
To serve, pile a mound of salad in a small deep plate or bowl, drizzle with a tbsp of Tahini sauce and sprinkle some chopped herbs on top. Pour the remaining Tahini sauce in a bowl and leave it on the table for your guests.

Yotam’s advices for that recipe:*Most beans, especially the ones sold frozen, are perfectly fine eaten with the skin on. So if you prefer to skip the skinning stage, cook them for a minute longer. You’ll lose a bit of the light, ‘bouncy’ texture but save yourself a lot of time.

**The sauce should be thick but runny, almost like honey. Once chilled it will thicken, so you will need to whisk it again and possibly add more water.

Ossobuco Alla Milanese

3 Apr

As you may have noticed, I am back on my blog…. The past 2 years have been sort of hectic with the pregnancy and the arrival of the twins in our lives! The new bottles-nappies rhythm kept me more or less out of the kitchen for a while and for the few new recipes I was able to try, I either did not have time to take pictures or time to write a post!

But here I am, back to work: whisking, frying, baking and having lots of fun trying new recipes! And as I looked at my Index of Recipes, I just realized that there was not that much meat recipes… not that I am a Vegetarian now but just that I am having more interest in sweets and vegetables… Anyway, I want to offer a wide range of choices and to do so, I am trying different techniques including meat!

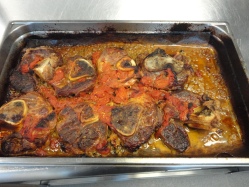
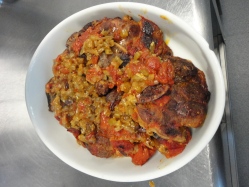
I choose Ossobuco because it’s not a common piece of meat but also because it’s one of the recipe that we learned at the Cookery School when we had to braise meat and it seemed to be so complicated at that time that I wanted to give it another try….

To our old fashion school recipe I preferred The River Cafe Classic Italian Cookbook recipe which is easier and very tasty. Also in that recipe they are using veal shin which is much better but also more expensive than the tail….!

By the way, if you did not have the opportunity to go to that restaurant…. it’s really worth it! We went there with my husband on a sunny weekday in April 2 years ago and we had a lovely time on the quiet terrace, a few steps from the Thames River walk. The fish is fresh and delicate, as well as the meat, the dressings are well balanced, the puddings are the final great touch. This is a feel-good place not a presumptuous one. Only one advice…. book in advance!

Ingredients for 6 people

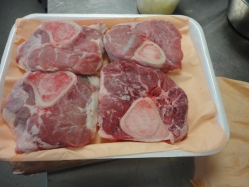
  • 6 pieces of veal shin – 2-3 cm thick
  • Sea salt and freshly ground pepper
  • Plain flour
  • 2 tbsp of olive oil
  • 120g of butter
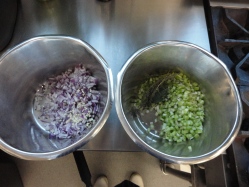
  • 1 small red onion peeled and finely chopped
  • 2 garlic cloves peeled and chopped
  • 1 celery heart peeled and finely chopped
  • 1/2 a bottle of white wine
  • 4 sprigs of fresh thyme
  • 2 bay leaves
  • 1 tin of plum tomatoes (400g) drained of juice and coarsely chopped

Ingredients for the Gremolata

  • 2 lemon zest finely grated
  • 1 clove of garlic peeled and chopped
  • 1 handful of flat leaf parsley chopped

Method

Preheat your oven to 150°.

First of all choose a heavy-bottom ovenproof pan or have a deep tray at hand in which the pieces of veal will fit in one layer.

Prepare all your garnish and set aside.

Season the veal with salt and pepper on both faces and dust with the flour. Shake off the excess of flour and reserve on a tray.

Heat the oil in the pan and brown the meat over medium-high heat just to sear the pieces on both sides.

If the pieces don’t fit in your pan, brown them into 2-3 batches. If you put too many pieces, it will not brown properly and if you have a pan too large, you may burn the oil. Just be careful to use the right pan…!

Remove the pieces from the pan and set aside on a tray.

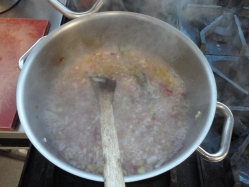
Wipe the pan and put it back on medium-low heat, add the butter and gently fry the onion, celery and garlic until they get very soft (10-15 min). Don’t forget to stir from time to time.

Once they are soft, cover with the wine and bring to the boil then reduce the heat and simmer gently until it reduces by half.

If the pan is big enough, place the pieces of meat back on top of the vegetables with the bones upright so that the marrow cannot fall out while cooking.

If you cook for a large number, spread the veg on a deep cooking tray and place the pieces of meat on top.

Add the thyme, bay leaves and chopped tomatoes on top. The liquid in the pan should come halfway up the pieces of veal.

If it doesn’t, add more wine and for the tray, add more wine and water and keep an eye on the level of liquid while cooking. If needed, repeat the same process, add more wine and water.

Bring to a boil then cover with a cartouche (parchment paper cut to fit inside your pan or tray with a hole in the center to release the steam) and the lid.

For the tray, you may put a serving spoon on top of the parchment paper if your oven has a fan as it will prevent it from flying away.

Cook for 2-2.30 hours in the lower part of the oven and check regularly that the liquid is gently simmering.

While that time, prepare the Gremolata: grate the lemon zest, chop the parsley and the garlic and combine them together and reserve in a bowl until serving.

As a result, the meat is not chewy but very tender and falls from the bone. You don’t even need a knife to eat it.

Serve the veal with the sauce and the vegetables from the pan and sprinkle the Gremolata on top.

Madeleines

18 Feb

Last summer, my friend Jeanne gave birth to a cute little Madeleine. As she was thinking of a canapes menu for the party after her daughter’s christening, she asked me about the Madeleines recipe in order to offer them home-made to her guests!

There is quite a lot of recipes for the Madeleines… even for the basic ones. One contains baking powder, another one is with melted butter and needs to rest, a third one is with butter at room temperature and so on…. I have tried many of them and the only thing that I can say is that I like my Madeleines when they are sweet and buttery in a well-balanced way. I don’t like them when they are too light and airy and they need to be cooked enough to have that nice golden color on the edges and at the bottom.

It’s up to you to make your choice among all the recipes you can find in books and on the web. Mine belongs to Philippe Conticini’s cookbook Sensations because I really think vanilla and lemon make the difference.

Madeleines

Ingredients for 20 madeleines

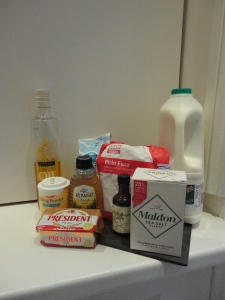
  • 125g of plain flour
  • 3 eggs
  • 140g of caster sugar
  • 135g of melted butter
  • 50g of semi-skimmed milk
  • 5g of baking powder
  • 2 tsp of honey
  • 1 tsp of fleur de sel or Maldon Sea Salt
  • 2 tsp of lemon zest grated
  • 1 vanilla pod cut lengthwise, seeds grated
  • 1 tbsp of groundnut oil


Method

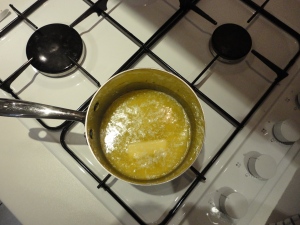
In a pan, melt the butter and let it cool down.

In a bowl, whisk together the eggs, sugar, salt, honey and vanilla seeds until it gets white and foamy.

Incorporate the groundnut oil and the lemon zest to the mix.

Mix together the flour and baking powder and add it to the mix then incorporate the melted butter that must not be hot.

Once the mix is uniform you can then add the milk, whisk it again and cover it with cling film to avoid any crust on the surface.

Leave it to rest at least 1 hour in the fridge.

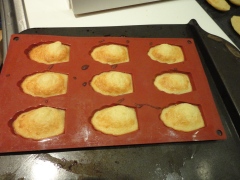
Brush the madeleines cases with melted butter and fill them with the mix up to 90% and leave it to rest another hour in the fridge.

Before baking the madeleines, preheat your oven to 160° with the baking tray in the oven.

Once the oven is ready, place the cold madeleines tray on the hot baking tray of the oven and bake it for 10 minutes.

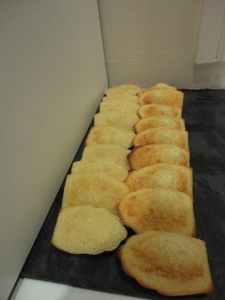
You can serve them straight away or leave them to cool down and keep them for later. The fresher the madeleines, the better… As many French treats, they don’t last very well and you may be disappointed the day after!

About the Madeleine’s shape… Philippe Conticini’s explanation:

You may think 2 hours of rest takes a while but it is what it takes to get a mix really cold.

Because the mix is very cold and the tray is very hot, the mix will react in such a way that a bump will appear.


Sticky Toffee Pudding with a Double Toffee Sauce… Just in Case!

7 Feb

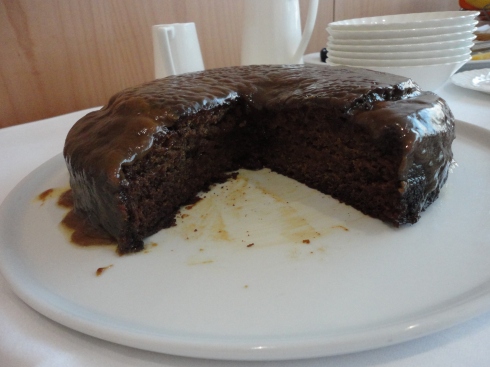
Last Sunday, we went to Chiswick in order to visit my friends Rhea and Martin’s flat. She booked a table in a very nice pub on the Thames called Annie’s. The place was perfect, there was a large table for our group, comfortable chairs, baby friendly waitresses and lots of games to keep them busy! The food was also really good, perfectly cooked fish for me with an amazing green aïoli on top and nice proper burgers, huge piece of crispy pork belly, generous salads for the others. But I have to say that the best part was the dessert. They had some Blueberry Cheesecakes and Sticky Toffee Puddings to share and I have to say that you can’t have a whole portion by yourself even when you are hungry…! It was really massive and generously covered with toffee sauce.

My friends just loved it and told me that it would be great to have a nice recipe on my blog…. then here I am! I asked about the best recipes and compared two of them and finally choose Simon Hopkinson one (the other one was from Peter Gordon if you want to know…!). I found it in his book called The Good Cook which contains plenty of great recipes and tips for anyone who loves to cook.

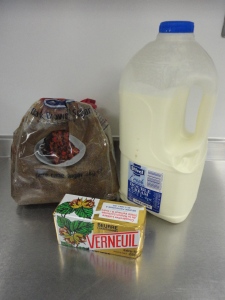
Sticky Toffee Pudding serves 6

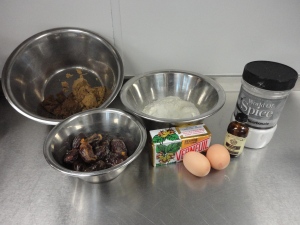
Ingredients for the Pudding:

  • 275ml of boiling water
  • 175g of Medjool dates pitted and chopped
  • 1 rounded tsp of baking soda
  • 50g of salted butter
  • a good pinch of salt
  • 75g of Demerara sugar
  • 75g of Dark Brown Sugar
  • 2 eggs
  • 175g of self-raising flour
  • 1tsp of pure vanilla extract
  • Soften butter to grease the mold

Ingredients for the Toffee Topping:

  • 250ml of double cream
  • 80g of salted butter
  • 80g of dark brown sugar

Ingredients for the Extra Sauce:

  • 300ml of whipping cream
  • 50g of salted butter
  • 50g of dark brown sugar

Method for the Pudding:

Preheat the oven to 180°.

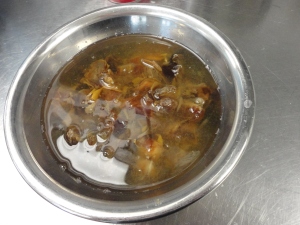
Once you have pitted and chopped your dates, put them in a bowl and cover them with the boiling water. Stir them and let them cool down a little bit.

In the meantime, measure out all the other ingredients and mix them with the water and dates. Pour the whole mix in a food processor or blender and puree it until nearly smooth with some bits of dates still visible.

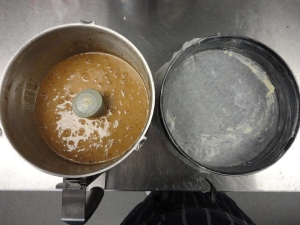
Prepare a loose-bottom baking tin to bake the pudding (at least 22 cm diameter and tall). Cover the base with parchment paper and grease generously the edges with soft butter.

Pour in the pudding mix and bake for about 30 minutes. Be careful, the mix must not fill more than half the baking tin as it will rise and you will still need some space to pour the toffee sauce on top.

The cake is cooked when a skewer comes out clean and the cake is firm to the touch. Let it cool down a little while preparing the toffee sauces.

In two small to medium pans, pour the ingredients of each sauce and heat gently. Whisk regularly until it comes to a boil and smoothly amalgamate.

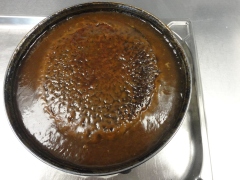
Pour the topping on top of the cooked cake and place under a moderate grill until bubbling and sticky-looking.

It may take up to 5 minutes depending on your oven. Let it cool down and get it out of the tin.

Serve it in a bowl and pour the extra sauce on top.

Spiced Pork Braised with Prunes and Apricots with Pan-Fried Polenta

22 Jan

It happens sometimes that we have a little time for a break in our kitchen. In that case, we keep on chatting a bit longer with a nice cup of ginger tea or coffee but sometime we seize the opportunity to dive into cookbooks to get fresh ideas.

As I am not really into meat when I am cooking, I have been looking at the meat section of different cookbooks and eventually, I spent most of my time in only one book:

The Food I Love by Neil Perry

This book is really full of inspiring recipes and Neil Perry gives plenty of tips about ingredients and method which is always valuable when you are on your own.

Basically, I wanted to try most of them but the Spiced Pork with the Pan-Fried Polenta won my attention and it was an opportunity to practice both on a Stew and on Polenta!

Here they are….. the recipes! The recipe indicates it is for 4 but I think it is rather for 6 especially if your are having finger food or starter before and pudding/cheese after!

Spiced Pork Braised with Prunes and Apricots

Ingredients

  • 1kg of pork shoulder diced into 2-3cm pieces
  • 1tsp of ground coriander
  • 1tsp of ground fennel
  • 1tsp of ground cumin
  • 1tsp of ground cinnamon
  • 2tsp of sea salt
  • 80ml of olive oil
  • 1 onion diced
  • 125ml of Porto
  • 250ml of red wine
  • 8 pitted prunes
  • 8 dried apricots
  • grated zest of 1 orange
  • 2 bay leaves
  • 500ml of veal stock
  • fresh ground pepper

Method

Mix all the spices and salt altogether and coat the pieces of pork with it. Cover and let it marinate for at least an hour or the night before.

Choose a large and deep heavy based saucepan for that recipe as you will have to add quite a lot of ingredients!

Heat the oil and spread only half of the pork in the pan and fry the pieces until it gets brown but be careful, if it’s too hot, the spices will burn. Also if you put all the meat, the risk is that the meat won’t fry and get a nice brown color. That’s why it’s better to do it into 2 times or more if you have to double the recipe for a large party!

Remove the first batch and repeat with the other batch then set aside for later.

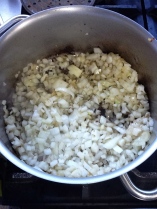
Now add the diced onion in the pan with a pinch of salt and cook it for another 5 minutes on medium heat until soft and golden brown.

You are not starting the recipe with the onions because they need to be cooked after the pork in order to get all the nice flavors of the spices and juices of the pork.

Then you can add the Porto and reduce it by half and add the wine. Bring it to a boil and cook it for another 5 minutes in order  to burn off the alcohol.

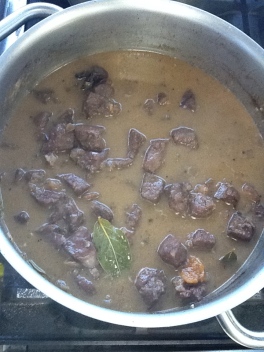
Basically, you’re almost done! Now you just have to add the pork, prunes, apricots, orange zest, bay leaves and stock and bring it to a boil then to reduce to a gentle simmer and cover it for 1 1/2 hours.

It’s important to cover the meat because it will keep it tender and the mixture will not reduce dramatically!

Remove the lid and cook for another 20-30 minutes. The pork has to be tender and the sauce is neither too liquid nor too thick. Adjust the seasoning with freshly ground pepper and salt if needed. Remove the bay leaves and serve it.

Neil Perry suggests pan-fried polenta, couscous or rice with that dish. Here I am telling you about the polenta but now that I have tried I may advise you to go rather for couscous or rice as it will be perfect to soak up the braising juices!

Pan-Fried Polenta

Ingredients

  • 100g of polenta
  • 375ml of milk
  • 250ml of chicken stock (or veg stock if you are on a vegetarian option)
  • 1tsp of sea salt
  • 50g of finely grated Parmesan
  • 50g of unsalted butter diced
  • freshly ground pepper
  • olive oil

Method

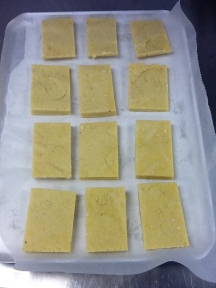
First, line a loaf tin (8*8*30cm) with parchment paper and set aside.

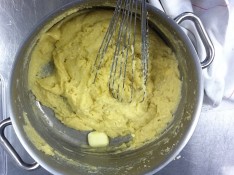
In a pan, almost bring to a boil the milk, stock and sea salt then shower the polenta into the mixture and stir continuously with a whisk. Still stirring, simmer over very low heat for about 40 minutes. The polenta is very thick and pulls away cleanly from the side of the pan.

Off the heat, stir in the Parmesan, butter then the salt and pepper up to your taste.

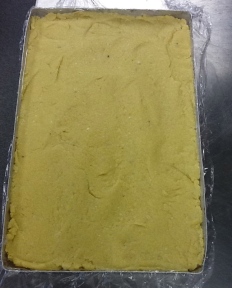
Spread the polenta into the lined tin and cover with cling film to prevent from crusting. Let it cool down then refrigerate for a few hours.

On the picture, the container is much larger than a loaf tin…. it’s just because I was cooking for much more than 6 people….

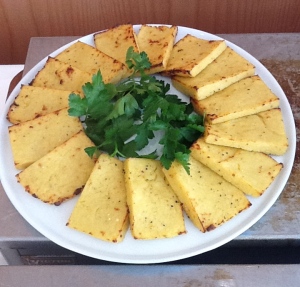
Once the polenta is ready, turn it out of the tin and cut it into slices 1,5-2 cm thick.

Heat the grill or a pan with olive oil and quickly pan-fry the slices until it gets a nice golden brown color or char-grilled marks.

You can also grill them in your oven.

The polenta can be cooked many ways, it can be creamier and served like a puree for example but you can also have fun with the shapes. You can cut them into little sticks for example and use them as a base for canapes….

My PicNic Basket…. Let’s travel to Lebanon with a Zucchini Mouttabal

18 Jul

What’s in my PicNic basket today????

Today, there is a great Cooking Book written by Andrée Maalouf called

Cuisine libanaise d’hier et d’aujourd’hui  

51NKenauZsL._SL500_AA300_

You will tell me…. “That’s it?”

Of course my answer is “Not at all” but it’s thanks to that book that I have been thinking about that PicNic Basket made of Middle Eastern and especially Lebanese dishes!

Today, I wanted to invite you to sit in the shade of a Cedar with my three Lebanese friends Rhea, Maria and Lara. Just take the time to imagine…. It’s hot outside but cool under the tree, a wide blanket has been spread in order to welcome as many guests as possible. The baskets are gathered all in the same place, just behind my friends who slowly start to deliver the treasures they brought. Suddenly, it’s not even a simple lunch but a feast that takes place in front of you…. The smell of the spices, the colour of the food, the beautiful dishes…. you can’t imagine that it can be touched!

Fortunately, your hosts will take care of you and gather artistically some of the specialties they brought. They will tell you about the names, spices, traditions to which belong each of them.

Now you can relax and enjoy….

  • Some Zucchini Moutabbal and Hoummous served with Lebanese Bread
  • A Bulgur Tabouleh with Grilled Vegetables
  • Dates and Pine Nuts Financiers


Zucchini Moutabal

Ingredients: for 8 persons

  • 6 medium courgettes skin on
  • 1 lemon, juice and zest finely grated
  • 1 garlic clove
  • 2 tbsp of tahine (sesame seed cream)
  • 1/2 tsp of 7 spices
  • Olive Oil
  • Salt & Pepper

Method :

  • Preheat your oven to 200°.
  • Wash the courgettes, trim the ends and cut the into 2 lenghtwise. Place them skin off on a baking tray covered with silicon sheet or parchment paper. Drizzle with olive oil, salt and pepper.
  • Bake them 20 to 30 minutes until the courgettes are cooked and tender.
  • Peel the garlic and finely dice or crush it.
  • In a large bowl, crush the courgettes then add the garlic, lemon juice an zest, tehine, 7 spices and adjust the seasoning to your taste.
  • If you have a blender, you can also use it but don’t over blend the Moutabal as it’s better when you can feel the texture.
  • In a hot pan or on a baking tray, spread the pine nuts and gently toast them.
  • Incorporate 4/5 of them in the mix and spread the last 1/5 on top just before serving.
  • Serve with Lebanese bread.

Version Française: Le Moutabbal de Courgettes

Ingrédients : pour 8 personnes

  • 6 courgettes
  • 1 jus de citron et son zest finement râpé
  • 1 gousse d’ail
  • 2 cas de téhiné (crème de sésame)
  • 30g de pignons de pin
  • ½ cac de 7 épices
  • Sel

Méthode :

Préchauffez votre four à 200°

Lavez les courgettes et retirez le pédoncule. Coupez-les en 2 dans le sens de la longueur et posez-les sur une plaque, chaire apparente vers le haut.

Cuire 20 à 30 minutes jusqu’à ce que la chaire soit cuite et tendre.

Pelez l’ail et émincez le très finement ou pilez le dans un mortier.

Dans un grand bol écrasez les courgettes, ajoutez l’ail, le jus de citron et son zest finement râpé, la téhiné, les 7 épices et assaisonnez selon votre goût. Si vous utilisez un blender, procédez par à-coup afin de garder un peu de texture.

Torréfiez à sec les pignons de pin dans une poêle ou au four. Intégrez les à la préparation.

Servez avec du pain libanais ou des mezzes.

The Cannelés Recipe…. at last

14 May

This recipe is very easy to do but it requires both time and equipment….

Time because you really have to let the mix set for at least one night and equipment because without the mold and a good oven, you’ll never get proper cannelés!

I tried different recipes but this one is the best. I found it in the cooking book of Helene Darroze

“Personne ne me volera ce que j’ai dansé” edited by Le Cherche Midi.

9782749104492

Ingredients:

  • 50 cl of whole milk
  • 2 vanilla pods
  • 50g of butter melted
  • 2 eggs and 2 yolks
  • 250g of icing sugar
  • 100g of flour
  • Rum (such as Mount Gay)

Method:

First, you have to split the vanilla pods lengthways and scrape the seeds and the pods into the milk. Bring it to a boil and let it infuse with the vanilla (for 8 hours….! or less if you don’t have time but the taste won’t be really the same!).

Once your milk is infused, take away the pods.

In a pan, melt the butter until golden brown.

Whisk the eggs and the yolks, add the icing sugar then the butter, the flour and the milk and the rum at last.

Cover the mix and leave it overnight in your fridge.

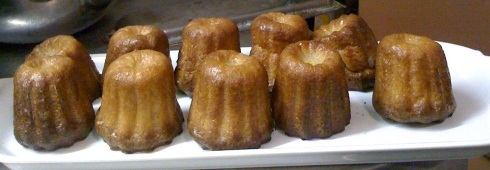
The day after, preheat your oven at 210° and grease your molds so that the cannelés comes out easily. I am using the silicon ones and even for them, you need to grease well! I broke a lot of cannelés because of that.
Whisk again the mix and pour it in each case. Stop to fill them at about 1 cm from the top because they will rise a little.

Put them in the oven and cook 10 to 15′ at 210°. Once they have a nice colour on the surface (like a flan) turn down the temperature at 180° and keep on cooking for at least 50 minutes.

After that, it depends how you like your cannelés….. Stop after a long hour if you like them not too cooked but keep on cooking another 30 minutes if you like them caramelized and crusty.

Get them out of the oven and turn them on a rack so that they cool down.

If you want to keep them, they will last a few days in a cardboard box…. but usually, they never last more than a few hours…..

IMG_0530

IMG_0527

Version Française : Les Cannelés

Ingrédients : pour une vingtaine de cannelés ou une multitude de minis

  • 50cl de lait entier
  • 1 belle gousse de vanille
  • 50g de beurre fondu
  • 2 œufs et 2 jaunes d’œuf
  • 250g de sucre glace tamisé
  • 100g de farine
  • Rhum brun (de bonne qualité)

Méthode :

Coupez la gousse de vanille dans le sens de la longueur et prélevez ses graines à l’aide de la lame.

Portez le lait à ébullition avec la gousse de vanille et ses graines. Laissez reposer le lait pour que la vanille infuse le plus possible. *

Faites fondre le beurre jusqu’à ce qu’il prenne une belle couleur noisette.

Dans un grand bol, fouettez les œufs et les jaunes puis incorporez le sucre jusqu’à ce que le mélange blanchisse et soit aérien.

Ajoutez tour à tour le beurre, la farine, le lait et le rhum (commencez avec une cuillère à soupe et ajustez au goût…).

Couvrez et réservez au réfrigérateur plusieurs heures (la veille pour le lendemain si possible).

Une fois que le mélange a bien reposé, préchauffez votre four à 220° **

Même s’ils sont en silicone, posez vos moules à cannelés sur une plaque de cuisson et beurrez les à l’aide d’un pinceau du fond vers les bords. ***

Fouettez le mélange pour qu’il reprenne une consistance homogène car comme pour la pâte à crêpes, une couche plus épaisse s’est formée à la surface.

A l’aide d’un récipient à bec verseur, remplissez les moules jusqu’à 1 cm du bord pour les moules normaux et 1/2cm pour les mini-moules.

Enfournez et faites dorer la surface environ 15minutes à 210-220°.

Si vous avez plusieurs plaques, inversez les plaques et/ou faites les tourner d’un ½ tour pour que l’ensemble des cannelés commencent à dorer et boursoufler.

Abaissez ensuite la température à 180° et continuez la cuisson environ 50 minutes (30 pour les minis).

Si vous les aimez très caramélisés, vous pouvez continuer la cuisson, sinon, sortez les plaques et laissez reposer quelques minutes.

Sur une grille, démoulez les cannelés et laissez reposer jusqu’à ce qu’ils soient complètement refroidis.

Les cannelés se conservent facilement une semaine dans une boîte cartonnée.****

* Idéalement, le lait doit infuser 8 heures. Pour ma part, je ne retire pas la gousse et la laisse infuser dans le mélange jusqu’au lendemain, juste avant de remplir les moules.

Vous pouvez aussi utiliser de l’essence de vanille mais dans ce cas, choisissez une très bonne essence car la vanille est un des ingrédients essentiels !

** Il est important que le four atteigne une haute température pour que les cannelés caramélisent dans le moule.

*** Pour ma part, je préfère utiliser des moules en silicone car ils sont faciles à entretenir et permettent un démoulage rapide mais il faut vraiment les beurrer pour éviter que le caramel ne colle aux parois et déchire le cannelé au moment du démoulage.

**** Evitez de conserver les cannelés dans un Tupperware ou au réfrigérateur car l’humidité va ramollir la croûte de caramel.